Saturday, May 30, 2020

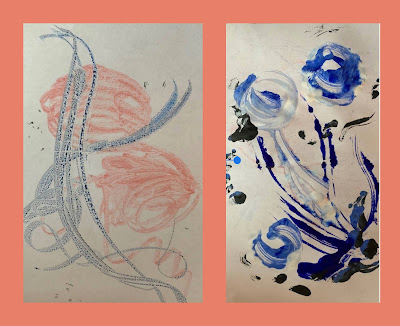
Project #33 - Shadow Drawing


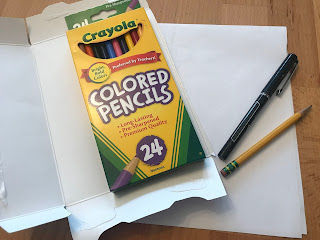
Materials - Paper and pen, marker or pencil


Making -
1.  You can work inside or outside, wherever the lighting is creating clear shadows on your paper. When you are working outside on a sunny day, the shadows will be bigger and longer in the early morning or late afternoon. That is because the sun is positioned at an angle. When it is in the middle of the day, the sun is overhead, so the shadows will be smaller and directly beneath your objects.
2.  Move your paper and object around until you find the best shadow for tracing.
3.  Trace the shape by drawing along the edge of the shadow.
4.  When you are finished tracing, you can freely draw more details.
5.  Then you can draw of paint some color into your picture to complete it.
6.  Maybe you could even make up a story to go along with your art!


Inspiration - Vincent Bal is a Belgian artist and filmmaker. One day back in 2016, while working at his desk, he noticed that the shadow of his teacup looked like an elephant. He enjoyed that discovery so much, that he decided that he'd do a new shadow drawing every day! He calls this style of drawing "shadowology". You can find his shadow drawings on Instagram and on YouTube.

https://www.youtube.com/watch?v=b-R-ZHTRksI


Project #32 - Playing With Fashion!

Design sketches by Cecilia
Materials - Paper, cardboard, pencil, marker, colored pencils, scissors.


Making -
1.  Draw a figure on cardboard.
2.  Cut it out.
3.  Use the figure as a stencil, and trace it several times onto paper.
4.  Imagine an outfit and start with pencil, if you like.
5.  Use pen to make final outline and details.
6.  Add color.
7.  Imagine your next fashion!
Inspiration - Today's inspiration is the art of Cecilia, a middle school student who loves all kinds of art making, including the design and making of clothes. Cece's interest in design began when she was in K-4 and would dress her dolls with fabric and ribbon. As she got older, she would cut and glue stuff together. Eventually, she learned to use a sewing machine. Cecilia says the thing she enjoys the most is being inspired by the right fabric and trims. The most challenging is when her fabric doesn't work out, because it shrinks or falls apart. In the future, Cecilia would like to learn how to make shoes, so she can make them to match her clothes.

Thanks, Cecilia, for sharing your artistic talents with us here on the Fratney Art Blog!


Wednesday, May 27, 2020

Project #31 - Collections of Objects

Materials - objects of a similar theme/activity, or objects from a collection. Optional: camera to document items, piece of paper and something to write with.

Making -
1. Find a great place to sit and make.

2. Read about artist Jim Golden below for inspiration for this project. Think about: what are some collections that you have? What about some collections that a friend or family member has? What about objects that you have that all relate to one theme (ex. Going camping, going for a walk, getting ready, making a food)? Can you make a rainbow out of objects in your house?

3. Pick out what collection/theme you will focus on. Get and organize your objects! Think about how you can display/arrange them. 
4. Take a photo of your objects if possible.
5. Optional: Write about the collection and why it is important to you. If you worked with a family member or friend’s items, interview them and see why the objects are important to them. 

Inspiration - Jim Golden is a photographer that specializes in stil life and products. He has worked in New York and Portland. He believes that collecting is human nature. He thinks that it is important to find things that you like, hang on to them, and enjoy them. This project below is part of his project called “Collections.” In his “Collections” series, he collects images of other people’s collections. Think about it: what can you photograph of one of your collections or themed objects?

Tuesday, May 26, 2020

Project #30 - ¡Las cometas!

Materials - Old sock or fabric scrap (approx. 6" square), popcorn, uncooked beans or rice, rubber bands, markers, a spoon, scissors, ribbon, crepe paper, yarn... and a nice day to go out and play!


Making
1.  If you want, decorate the fabric or sock with markers.
2.  Fill the fabric or sock with popcorn, rice or beans,
3.  Close it tightly with a rubber band.
4.  Cut some varying and long lengths of ribbon, crepe paper, yarn (whatever you can find)
5.  Tie the long strands of various materials onto the cometa tightly with yarn or string.
6.  Go outside and have fun throwing your cometa into the air!  Play catch with a friend or family member!

Inspiration - My inspiration to make cometas comes from my friend, Ximena, who taught me how to make them.  She is very resourceful with materials for making art. Ximena is a poet and artist from Chile. She was also a first grade teacher at La Escuela Fratney for many years. During that time, we did many creative projects together.

Monday, May 25, 2020

Project #29 - Hinged Puppets


Materials - Cardboard, pen or pencil, scissors, needle and thread, colorful paper and/or other collage items.
Making
1.  Draw an "exploded" view of a figure of a person, or any type of imaginative character.
2.  Cut the pieces out.
3.  Sew the parts together by poking a threaded needle through the two cardboard pieces you are joining, tying a knot, then trimming.
4.  Decorate with colored paper, collages items, drawing, or any other idea that you like.

Inspiration - Annie Katsura Rollins is a Chinese-Japanese-American who was born and raised in Minneapolis, Minnesota. After studying Theater Arts in college, Annie spent some time traveling in China to study the ancient traditions of shadow puppetry. She spent time in small villages where the whole community gathered to create and enjoy storytelling through elaborate shadow theater productions. Now Annie lives in Montreal, Canada where she works creating shadow puppets and theaters. She also works to educate people about the history and beauty of the Chinese traditions of this art form. You can find out more at her website: https://www.chineseshadowpuppetry.com
https://vimeo.com/41524173

Saturday, May 23, 2020

Project #28 - Collographs

Materials - Cardboard, scissors, glue, paper, crayons

Making
1.  Cut a piece of cardboard that will be your background surface.
2.  Decide on a design that you will create. Some ideas include; landscape, portrait, animal, still life, or abstract composition.
3.  Cut the shapes you need to construct your design.
4.  Glue the shapes into place on your background.
5.  Give the glue 5-10 minutes to dry.
6.  Place a sheet of paper over your collograph plate.
7.  Use the side of a peeled crayon and rub across the paper and the texture of you design will appear.
8.  If you want add details to your design using other colors.


Inspiration - Corwin Clairmont grew up in the Salish and Kootenai cultures. He began winning awards and being recognized for his art talents as a young teenager. Later, he went to art school. Now, he is part of a group of Native American artists who use their art to speak out about political issues and cultural identity. Corwin Clairmont uses collography and other printmaking techniques in his art, as well as photography and collage.
Corwin Clairmont (Salish)
Indian Land Passage Denied, collograph and chine colle, 2005; 151⁄2 x 18”


Thursday, May 21, 2020

Project #27 - Experimental Printing

Materials - Plastic wrap (from the kitchen), markers or any type of paint

Making
1. Find a great place to sit and make art
2. Gather your materials
3. Put out the plastic flat on a surface
4. Put down color (either markers or paint) on plastic. 
5. Make a design, try to mix colors, or experiment with text. Use work from artist Christopher Wool as an example!
6. Lay paper on top of the color and press. Slowly pull up. 
7. Try another print over the color with another paper, or lay down some more colors/wipe off the plastic and try again! 


Inspiration -Christopher Wool is an artist who uses many different styles to create art, such as spray painting, screen-printing, lithograph printing, hand painting, and other methods. He often paints in layers and uses strategies to show gestures, depth, and flatness. He often experiments in his artwork processes. Take a look at his prints below and think: how can you experiment with how you apply paint and color to create a print?


Thursday, May 14, 2020

Project #26 - Salt Dough Impressions

Materials - Flour, salt, water, nature items 
**This creates salt dough, which can be used like clay! It is important that you don’t eat it, even though it is made out of flour, because we will be pressing in items from nature into it and coloring/painting it. 


Making 
1. Gather some items from nature. Go for a walk or step outside! Look for leaves, rocks, sticks, etc. You could use something from inside, as well. 
2. Get 1 cup flour, 1/2 cup salt, and 1/2 cup cold water. This makes quite a lot, so you can adjust the recipe as needed. For my example, I used ½ cup flour, ¼ cup salt, and ¼ cup water. 
3. Mix flour and salt in a bowl together. Slowly mix in water, a few tablespoons at a time, until the dough is smooth. 
4. Knead the dough for 10 minutes, and then, let it rest for 20 min. 
5. Preheat the oven to 250 degrees F. Roll some of the dough into spheres and press down to make circles. You can create impressions by pressing your nature objects into the dough. Another option is to form the clay to resemble a nature item (see the leaf here!). 
6. Place on a pan and cook for 2 hours or until dry and hard. 
7. Once it’s done, you can paint or draw on the impression to add color and detail. Look at your natural items for inspiration/reference!


Inspiration 

Check out this artist, Kathy Boyland. She preserves nature through pressing flowers, leaves, and other nature items into clay. Sometimes, she fires them in a kiln. Take a look at some of her work for inspiration! 

Wednesday, May 13, 2020

Project #25 - Foil Figures


Materials- Aluminum foil, newspaper, flour, water, scissors, marker, OPT. box or other container (for base).

Making-
1.  Start with a piece of foil, 12" -18" long.
2.  Use a sharpie marker to draw a line from the bottom in the center and up 1/3 of the way, two lines that divide the width into 1/3's from the top and down 1/3 of the height, and then a line drawn fom each side 1/2 way down and 1/3 of the way in.  
3.  Cut along each of those 5 lines.
4.  Gently crush each section to form legs, arms and a head.  Crush the sections down further.
5. Tear newsprint into small narrow strips.
6.  Mix a bowl of flour paste, 1 part hot water to 1 part flour.
7.  Starting in the center of the torso, apply paste to the foil form, then wrap with paper, then add more paste.
8.  Continue to work one section at a time until the figure is covered.
9.  Using the same paper mache technique to cover a box that will be a pedestal for the statue.
10.  OPT. - you can speed the drying of the paper mache by putting it into the oven at 250 degrees for about 20 minutes or until dry.
11.  Once dry, glue the pedestal and figure together.

Inspiration - Albert Giacometti was a Swiss painter and sculptor. He is best known for his thin elongated figurative sculptures. These figures have a dreamlike quality, evoking feelings of quiet and solitude.  Giacometti's models for his artwork were members of his family.  Before Giacometti made these large thin sculptures, he many many miniature sculptures that were only a couple of inches tall. He came from an artistic family. His father was a painter, one of his brothers was an architect, and the other was a designer.  Giacometti lived in France during World War II, and many believe that his sculptures express the fear and isolation that many people felt during the war.
Albert Giacomettie, Falling Man, 1950
Albert Giacometti, Walking Man, 1960 

Friday, May 8, 2020

Project #24 - Los Cascarones

Cascarones are confetti-filled eggs that are mostly thought of as a part of Carnival celebrations, though are increasingly a part of other special occasions such as Easter, New Year's and birthdays. I was thinking that they could be an easy and fun gift to give for Mother's Day. Find out more about the inspiration and history of cascarones underneath the directions for making them.

Materials - Eggs, paper to cut into confetti, scissors, perfume (to fragrance the confetti), permanent markers, water & glue mixture, paintbrush, art tissue, small soft plant material.
Making
1.  Gently tap one end of the egg to create a small crack, then break away a small hole (try for less than 1" in diameter).
2.  Gently remove the egg whites and yolk.
3.  Wash the egg, then set it aside to dry. 
4.  Find some colorful paper and spray it with a favorite perfume.
5.  Cut the paper into thin strips and then into small pieces.
6.  Decorate the outside of the eggs. I tried 3 different ways, though of course there are many other ways:
*  Use permanent markers to print a message and add designs.  Watercolor markers can be used to add areas of color, but they will smudge easily.
*  Cut small shapes out of art tissue. Then use a paintbrush to coat watered down glue under and over the tissue paper shapes. 
*  Use the same watered down glue approach to decorate an egg with small soft plant material.
7.  After the eggs have dried, inside and outside, pinch bits of confetti inside each egg. It's best if you fill each egg at least 1/2-full.
8.  Glue art tissue over the hole to close it.
9.  Give the cascarones as a gift.
10. With permission, you or the person who received the cascarones gift can tap it gently while making a wish, the crush the egg over someone's head to sprinkle the perfumed confetti all over them.
Inspiration - I first learned about cascarones in a book titled, Family Pictures /Cuadros de Familia by artist and author, Carmen Lomas Garza. In this book, and many others, she illustrates the everyday traditions of her Mexican-American family growing up in South Texas.

An example of how cultural traditions travel the world, it turns out that cascarones first appeared in China centuries ago. It is thought that the explorer, Marco Polo, brought them back to Italy, then Spain. The custom made it's way to Mexico, and has since become known in the Southwest of the U.S. Cascarones were originally filled with powdered perfume, though now in Mexico and the U.S. they are usually filled with confetti.  Cascarones are most commonly a part of Carnival celebrations in Mexico, but are increasingly a part of Easter and other annual festivities.


Cascarones (Easter eggs)

1989, Carmen Lomas Garza


Wednesday, May 6, 2020

Project #23 - Mythical Creatures Inspired by Curiot

Materials - Paper, pencil, watercolor paints/other paints or markers/colored pencils

Making 
1. Find a great place to sit and make art.
2. Find a piece of paper and gather your supplies. 
3. Think of a mythical creature that you would like to create - you can combine human and animal characteristics.
4. Does your creature have a story? Keep that in mind as you make…
5. Sketch out your creature. Include shapes and patterns!
6. You can outline in marker if you want.
7. Use bright color to fill in your creature.
8. Write out your creature’s story. 
My creature is an explorer at the bottom of the ocean. He came across a city that looks much like Milwaukee! 

Inspiration 
Curiot (Favio Martinez) is a Mexico-city based painter and street artist that creates vibrant mythical creatures that are part animal and part human. Much of his work can be found in large murals on the street. His creatures are inspired by Mexican folklore and traditions, including tribal art, Day of the Dead, and geometric designs. In his work, look for geometric patterns and lively colors. Take a look at some of his work below to get inspired to create your own mythical creature that tells a story of your own! You can research traditions and gather inspiration, or, you can create a story. Think about: How can you combine human elements/animals? How can you use bright colors, shapes, and patterns?